Photography Class
Bong S. Eliab
First Semester
Humanities Division
School of Arts and Sciences
Ateneo de Davao University
Syllabus | Notes | Papers | Projects
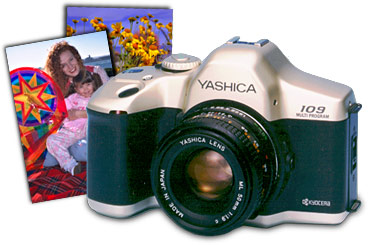
Making Good PhotographsFilmsOnce upon a time, Kodak manufactured a handful of film types for the amateur. Today, Kodak sells literally dozens of films for amateurs, and has been joined in the retail market by a few other companies with still more films. To make matters more confusing, new films appear each year. Rather than try to discuss each individual kind of film available, we will discuss the types. This will enable you to make your own choices. The first decision is to choose between Black & White film or color. This might seem surprising since color photography seems to be the universally accepted standard for all amateur photography. There are, however, some real reasons to consider B & W. Last week, when discussing composition, one of our rules was to simplify and remove distractions. When we look at a scene in terms of information content, is it possible that color is a needless distraction? What are you trying to communicate? If you are going after the subtle hues of a morning sky, then color is certainly appropriate. By contrast, if you are doing a portrait, then color might not be flattering to your subject. If you wish to communicate a portrait of expression and character, then resolving every skin blemish in living color may not at all be a good idea. Consider birth pictures. If you want to say that having a baby is a gory business, then use color. If you want to focus attention on a beautiful new life then switch to B & W and let the inevitable traces of blood disappear into a nondescript gray. More information is not necessarily better. If color is not an essential component of your communication, go with B & W.
Color Films Even once you select color you still have a few decisions. Color films are available in two main varieties: color negative film which is used to make color prints, and color reversal film which results in transparencies (slides). Reversal film has the word chrome as part of its name. Examples are Kodachrome, Ektachrome, and Fujichrome. During processing, the film which you placed in your camera develops a positive image. When you pull reversal film out of the processing tank, you will see a long strip of little pictures. Each frame on the roll is then cut and secured in a cardboard mount. The slides may be projected for viewing. Slides are obviously great if you need to project images for a show. Reversal film is also great for learning about exposure. Remember that the slide is the film that was inside the camera. Whatever you do to that film is what you see in the slide. There is no intermediate exposures, such as print making, which can introduce errors or corrections. What you shoot is what you get. Color prints are available from transparencies. Color reversal films come in two varieties: daylight and tungsten. This refers to the light which the film is balanced to record. Daylight, by definition, is white. It is a mixture of all wavelengths of the visible spectrum. A prism can be used to split sunlight into its rainbow of constituent colors. When daylight slide film is used to photograph a white sheet in bright sunlight, the resulting image will be transparent on the slide. Now consider light bulbs. The light from a bulb is generated by heating a piece of wire. The color of that light depends on several factors, chiefly the kind of wire used in the filament. Most filaments use tungsten wire. This kind of light is deficient in the color blue. As a result, the light appears slightly yellow. If you haven't noticed this, it is because your mind corrects what your eye sees. However, film does not have a mind. Therefore, tungsten slide film adds a blue mask which removes the excess yellow. Tungsten film is great to use when shooting inside places like museums and art galleries.
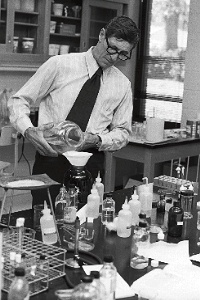
Negative film has the word color as part of its name. Examples are Kodacolor, Vericolor, and Fujicolor. A negative film forms a negative image of the photographed scene. Bright scenes become dark or dense on the negative. Colors record as their complements. A bright red appears on the negative as green. Modern color negative films use a plastic base that is transparent orange. This mask makes it easier to perform color balancing and exposure when making prints. Once the negative has been processed, its image is projected with an enlarger onto color sensitive photographic paper. This paper is also a reversal paper. It reverses the colors on the negative so they return to their original hues. A great deal can happen during the printing of a color negative. First, all of the pitfalls about metering apply to this second exposure. An automated printer does not handle contrast very well. Also, colors can shift. Colors in nature are not absolute. The color of an object as seen by film depends on the color of the light bouncing around. If the sunlight bounces off green grass before illuminating your subject, then that light will be decidedly green. Our eyes compensate for this. We rarely notice the tint because our brains know what skin color is supposed to look like. Film can't do this. The correction must be done using filters when the print is made from the negative. With custom printing, a human checks the final result to insure that skin tones look natural and the colors are balanced. An automated printer at the local lab simply balances each photo for a color equivalent of 18% neutral gray. As a result, if your image is not an average mix of colors and density, the automated printer will probably not produce a faithful reproduction. For example, the Bethesda Cardinals have red as the school color. Shoot a line up of children in their red Bethesda tee shirts and invariably the print will come back showing children with green skin. This, for some reason, is euphemistically called subject failure. The automatic printer detects the red and adds green filtration to bring the whole print back to average. The moral of this story is not so much to beware of bold brilliant colors as it is to expect this sort of thing from ordinary labs. Consider the one-hour prints as proofs. If you have made a good quality negative, and the image deserves immortality, then take it to a professional custom lab for an enlargement. Don't take the job back to the one-hour lab. They usually apply the same lack of intelligence to the enlargement as they applied to the proof. Color printing is an art. It is not a strictly mechanical process. Color negative film is a very sophisticated technology, particularly in the case of amateur films. Modern films possess what is called wide exposure latitude. Exposure latitude means that exposure need not be precise in order to give an acceptable print. Kodacolor 100, for instance, can deliver a print even when it is two F-stops under exposed or three F-stops over exposed. This is remarkable. Film Speed Both B & W and color films come in a variety of ISO film speeds. The speed of a film is a measure of how quickly it registers an image during exposure. A higher speed film can be used with less light than what is required for a slow speed film. Why then would anyone use a slow speed film? The reason is grain. The grain of a film refers to the tiny microscopic particles which form the image. On the negative or slide itself, the grain is unnoticeable. However, when the negative is enlarged the particles are enlarged as well. Unfortunately, a higher speed film requires the use of larger particles than a slow speed film. This limits the resolution available and limits the practical degree of enlargement. That's the trade off. High speed means you can use a shorter exposure or work in less light; it also means your prints will be grainy and will not stand up to enlargement. A general recommendation is to use the slowest film that conditions permit. What is fast and slow? The ultimate color slide film is ISO 25 Kodachrome. According to Kodak, Kodachrome is a "professional color slide film with superb definition characteristics." However, ISO 25 is pretty slow by almost anyone's standards. Kodachrome 64 is a faster version. This is my recommendation for color slides. Under ordinary daylight conditions, ISO 64 is adequately fast to deliver great results. For low light level conditions, Ektachrome 200 is good. With tungsten light, Ektachrome 160 (Tungsten) is a life saver. In color negative films, I recommend Kodacolor 100 for ordinary daylight. If you have a small or built-in flash, then perhaps Kodacolor 200 will be required. Kodacolor 400 or 1000 should only be used in special situations. Kodacolor 100 is a terrific general purpose film. It has good color rendition, adequate speed, good shelf life, and the grain is fine enough to withstand routine enlargement to 11 x 14 inches. This same recommendation applies to some other ISO 100 color negative films, particularly that made by Agfa. Black and White Films You might think the selection of B & W films would be smaller than color films. Unfortunately, this is not the case. The good news is that so many of the B & W films are for special use that we can ignore all but a few. Two B & W films can cover nearly all circumstances. The first is Kodak Plus-X Pan which is rated at ISO 125. The other is Kodak Tri-X Pan, rated at ISO 400. Both of these are great general purpose films which are readily available, reasonably priced, and can be developed at home with little trouble. A British company, Ilford, makes two comparable films: Ilford FP for ISO 125 and Ilford HP-5 for ISO 400. These are easily equal to the Kodak films. Development of B & W films is an easy four step process. The film is first loaded onto a spool which is placed inside a light-tight processing tank. Then a developer is poured it. Films typically develop for around six minutes, with occasional agitation. The developer is poured out and a stop bath is added. The stop bath halts the developer. Finally, a Fixer is used to fix the image on the film and make it so that it is no longer sensitive to light. After about five minutes, the fixer is removed and the film is rinsed for about twenty minutes to remove the chemicals. Probably the hardest part about developing B & W film is learning to put the film onto the spool. This must be done entirely by touch in total darkness. The discussion about grain generally applies to B & W film as well as color. However, B & W has finer grain for a given speed. Thus, even ISO 400 B & W film may be used to produce an 11 x 14 inch enlargement without too much loss of definition. Week Two:Portraiture
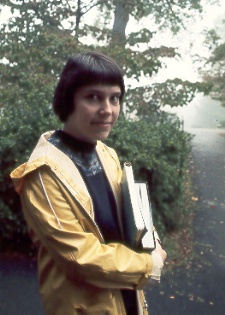
For many people, photography is synonymous with portraiture. Indeed, when photography first became practical, in the last century, the promoters asserted that portrait painters would be driven out of business. While portrait painters have not entirely gone the way of the slide rule, photographic portraits have become an essential part of family history. A well-developed skill at portraiture is a treasured art. It is through portraits that we document and interpret the lives and times of those we love. Photography can freeze a bit of the present. It truly preserves memories. These treasures are worth a great deal of effort. A photographic record helps put the years into perspective. You can gain a real sense of family by looking over quality portraits that not only register a person's face, but say something about their life. These kinds of portraits won't be done in a studio. They are only done by a patient and understanding photographer. Before jumping in to portraiture, recap the rules of good composition. These principles still apply, particularly the need to keep the image simple. In a portrait, the subject is obvious. Therefore, be aggressive in eliminating distraction. Get down to the essential elements. Include only things which say something about the subject. Most subjects are uncomfortable having their portrait made. The photographer, therefore, must do double duty. They not only have the job of composing and exposing an acceptable image, they must also interact with their victim. Cooperation is essential. Gaining the cooperation is called subject control. There are no magic formulas or simple answers. You must respect the wishes of your subject, shoot enough photos to obtain one that is good, and establish technical credibility. Once you produce a few good portraits, your relatives won't groan when you show up at a family gathering with a camera.
Keep the portrait session a low-key affair. Pose the subject in comfortable surroundings -- a favorite chair, at the workbench, in the garden, etc. Tell them you want to take a few pictures. Give them something to do with their hands. Be on the lookout for natural portrait occasions. Don't force your subject to smile! A beautiful portrait does not equate to a silly grin. You can't pick up your camera, point it at someone, yell "SMILE," and expect a quality portrait. Shoot for personality. Go for the Mona Lisa smile, a thoughtful expression, or the diabolical twinkle. Don't force a big grin. Think about some of the great portraits. How many show great big smiles?
It is even possible to have a portrait without showing a person's face. Think about what you are trying to say about a person. Place the subject in the context of their life. This may mean a photograph from the back, or merely include their hands. Be imaginative. I once did what I consider a self-portrait. It is a picture of my desk top in the middle of one of my projects. The photograph says a great deal about me, even though I appear no where in it. Now let's talk about some real How to. For good expressions, try some tight face shots. Ask your subject to make a bunch of different expressions, even some silly ones. Communicate immediately that you are just having fun. Maybe they will clown around too. This could be among the most memorable pictures in their lives -- the one time when they didn't have to smile at the camera. For head and shoulder portraits, try positioning your subject's body at an angle to the camera. Otherwise, the result looks too much like a mug shot. Try shooting from a high or a low angle. Beware, though, of shooting up their nose. This is not flattering. For a full-length portrait, your subjects definitely needs something to do with their hands. Give them something to hold. Be sensitive to facial features. If someone has a rather large nose, don't shoot a profile. Instead, shoot straight on to their face using lighting that does not cast shadows. This might be an opportunity for an environmental portrait. Show the person in context and don't worry about moving in too close. Beware of reflections off of eye glasses. This is particularly appropriate when using flash since it is difficult to predict how the glasses might reflect. The best strategy is to shoot a variety of positions and cross your fingers. Groups Photography of groups is really just an extension of portraiture. Begin by telling them to bunch together more closely than they would ordinarily stand. Filipino males like to keep some distance between people, particularly strangers, and a direct order from the photographer relieves them of self-consciousness. Try to layer their faces at different heights. Avoid the line up. Use an interesting angle. Climb up on a table or lay down on the ground. Finally, take several pictures in each pose. Someone is almost always in the middle of a blink for a few of the shots. If you take many group pictures, be sure to steal posing ideas from magazines and newspapers. Coming up with new and exciting ways to pose a group can be a real challenge. Exercise 2.0Shoot a whole role of portraits: head & shoulders, full-length, and environmental. Exercise good composition and be receptive to interesting lighting. |
Syllabus | Notes | Papers | Projects
All Rights Reserved 2001
Ateneo de Davao University
22 June 2002