THE EQUIPMENT
A Basic Camera Primer
What IS a camera? Basically, it's a light-tight box that contains a hole for the light
to pass through (nearly always in the form of a lens), a shutter, a viewfinder and a place
for light-sensitive material known film.
The less expensive point-and-shoots and Instamatics are the simplest cameras, with
roots in the box cameras of the 1930s and 1940s. On such cameras there are no adjustments
except for a film advance. They're fixed focus (usually five or so feet to infinity),
fixed shutter speed (typically 1/125 of a second) and fixed aperture or lens opening (such
as f/9.0). Such settings are good for most outdoor situations. Their secret to success is
in the film. Today's films have an incredible latitude or fudge factor. Using the widely
available Kodacolor print film, for example, you can be five lens stops (or
openings/aperture) under- or over-exposed from an optimum setting and still get some kind
of image. And when you take that film in to your local one-hour lab, the equipment there
helps your pictures along even more. An electric "eye" in the processor reads
the density of each negative and adjusts the exposure so that mid-tones predominate in the
print. Slide films don't have this tolerance. If you over-expose or under-expose slide
film even slightly, that photograph will appear washed-out or dark and "muddy."
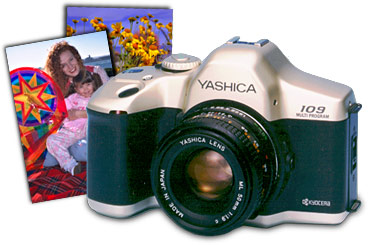
SLR Cameras (Required for This Class)
SLR (single-lens reflex) cameras have two big advantages over box cameras/point and
shoots: SLRs accept many sizes of lenses, and you can view your image right through the
lens. The ingenious mirror and prism system shows you what the film will see. On most
models, keep in mind that a little bit of the image may be lost at the viewfinder's edges.
Loading Your Camera
(1) Set your film speed ISO number, which measures the sensitivity of film to light,
according to the number on the box or film canister. The higher the ISO, the more
sensitive that film is to light. Most of the time on manual cameras either lift the outer
ring on the rewind crank or on the outer ring on the shutter speed dial. On automatic
cameras the ISO is set for you, with the camera "reading" the DX pattern/code on
the film canister.
(2) Drop or gently wiggle the cassette into its chamber, secure the leader of the film
strip to the take-up spool and engage the sprocket teeth in the film holes (both top and
bottom). Make sure the inside of the back of your camera is as dust-free as possible (see
"Cleaning").
With manual cameras, once you've loaded your film and closed the back, do not assume all
is well. Gently turn the rewind knob/crank clockwise until you feel the film pull snug; if
it rewinds freely, you know it has come loose from the take-up spool and must be re-engage.
Snugging the film tight also ensures that it lies flat as it feeds through the camera.As
you advance the film to the first frame,watch to see that the rewind knob turns; this
shows the film is being drawn out of its cassette. If the frame counter is NOT advancing,
open the camera back and make sure the film hasn't torn or it hasn't slipped from the
sprocket teeth. Most automatic cameras will give you a loading error message on your
digital readout if the film's not advancing: Check your camera manual for details.
Removing Film from Your Camera
On a 24-exposure roll, you can generally get 25 or even 26 photos; on a 36-exposure
roll, 37 and sometimes 38 frames are possible. Once the film won't advance any more as you
cock the shutter (don't try to force the shutter, or you'll strip the sprocket holes,
resulting in jammed film), you know you've finished the roll; automatic cameras will give
you an error message.
Release the "clutch" before rewinding. On manual cameras, this is the little
button on the base of the camera body. Automatic cameras feature a variety of ways to do
this; again, check your manual.
After rewinding, open your camera back, lift your rewind lever, and remove the film.
Always wind the film leader all the way into the cassette so you won't inadvertently reuse
the roll of film a second time.
If you inadvertently open your camera back before you rewind the film, don't despair.
QUICKLY re-close the back, then rewind. You'll lose the frame stretched across the film
curtain and maybe one or two frames on the exposed side, but because the film is rolled
tightly, you'll likely salvage the rest of the roll.
Camera Health and First Aid
· PLEASE Don't Drop! Camera-dropping can be deadly to your equipment.To avoid
dropping it, always use a camera strap and have it around your neck when you're shooting.
Even when the camera is on a tripod, hang onto that strap, as tripods often fall over,
with catastrophic results. Don't let the strap hang loose where you can snag it as you
walk by, as on a table.
· Protection. A case helps protect the camera from dust and can minimize damage
if you DO drop the camera. You'll find that you're more efficient as a photographer if you
can get a case with compartments for camera body, lenses, film, and flash unit; cases made
to fit individual cameras are fine, but some photographers call them
"never-ready" cases (as opposed to ever-ready) because they get in your way,
especially when you're changing film. They're okay in a backpack.
· Camera Enemies. Avoid extreme temperature conditions, especially heat. In
humid environments, use small packets of silica gel in your camera case. A worst-case
environment for a camera is an ocean beach. Salt air corrodes the metal, sand can get into
the workings, heat damages the system and water can really ruin a camera's day. After a
visit to the beach, wipe down the camera body with a soft cloth to remove any salt/sand
residue.
· Storage. For long-term storage (several months or longer), seal in a
dust-proof bag and add that silica gel. Remove the battery; old batteries can leak and
cause havoc. On a manual camera, make sure the shutter isn't cocked, or after a while the
spring will suffer metal fatigue so that shutter speeds are no longer accurate;
periodically run the shutter through its paces to "limber up" any lubricants.
· Water Disasters. Manual cameras can sometimes survive a drop into a lake.
Cameras seldom survive salt-water disasters, however. If your camera falls in the drink,
you have two options. You can try to save the camera by immediately opening up everything
you can, such as the back of the camera and removing the lens from the body. If you've
dropped the camera into salt water, rinse it thoroughly in fresh water. Then you need to
dry the camera out as quickly as possible. A hair dryer helps, or an oven set at a very
low temperature (100 degrees F.). OR you can keep the camera submerged in a bucket of
fresh water (rust only occurs when oxidation occurs) until you can rush it to a repair
shop. If your film contains once-in-a-lifetime images, you may be able to salvage
the film by transporting it VERY carefully in water. Caution: the emulsion may slide off
if jarred. If your automatic camera gets wet, you probably can't salvage it.
· Cleaning Your Camera. Dust will shorten the life of your camera and cause
reductions in quality of your images. Best is a can of compressed air (make sure it
doesn't contain CFCs!); hold it upright when using. Be particularly careful of your
mirror; use the air only from a distance of a foot or more. If you don't have canned air,
use a camel hair brush/blower combination. After you've removed as much dust as possible
with one of the above, wet a camera lens tissue with lens cleaner (don't apply cleaner
directly to camera or lens) and GENTLY clean in a circular motion-don't grind. A dirty
rear lens element will affect your image more adversely than the front element. Don't
touch the mirror with lens cleaners, or your fingers, for that matter. Be sure to clean
the inside of the back of the camera (where the film goes), but be extra-careful of the
film curtain, which is extremely fragile.
· Batteries, Batteries, Batteries. Today's automatic cameras are particularly
vulnerable to battery problems: If you have dead batteries in an automatic camera, the
camera simply won't work. In a manual camera, the batteries power only the light meter, so
that you can still use the camera, though you must guess at the exposure. Low batteries
result in erratic performance. When changing batteries, make sure your hands are clean of
oils (or use a handkerchief or other cloth to handle the batteries). Use a clean pencil
eraser to make sure the contact points are clean. Change the batteries at least once a
year (on your birthday or other holiday is one way to remember). Keep an extra set with
you. Extreme cold will affect battery performance (except for lithium); in such
situations, keep your camera inside your jacket to keep it warm, or use a remote battery
cord. Manual cameras are not as vulnerable to battery failure, as the batteries only power
the light meters. |